November 21, 2013

The basics of electric fencing

Introduction

Whether you're trying to keep livestock from roaming off of your property or trying to keep pesky deer out, an electric fence is the ideal solution. When installed properly, an electric fence will generate a mild shock to discourage the animal from venturing through the fence. While installing an electric fence is not an overly difficult job, electricity is involved so extreme care must be taken. Before you attempt to install one on your own, please read this article and check the Tips and Warnings found at the end.

Instructions

Difficulty: Moderately Challenging

Things You'll Need

  • Electric Fence Controller
  • 10 to 14 Gauge Wire Insulated for 20,000 Volts
  • Grounding System (copper or galvanized rods and brass clamps)
  • Electric Fence Posts
  • Insulation Wrap
  • Post-Hole Digger
  • Hammer
  • Screwdrivers
  • Wire-strippers
  • Pliers

Steps

1

Step One

Find a weather-resistant location for your electric fence controller. This can be under an overhang or inside your basement or garage. Wherever you decide to place it, make sure that there is an available 120 Volt polarized outlet (an outlet where one blade slot is slightly larger than the other). Install the electric fence controller, but do not plug it in yet.
2

Step Two

One grounding rod will need to be installed within 20 feet of the electric fence controller. The grounding rod should be at least six feet long (all of it underground) and made from copper or galvanized. Run a grounding wire (10 to 14 Gauge, 600V to 20,000V) from the controller to the grounding rod and use the grounding clamp to secure the wire to the rod. Ensure that the clamp bites through both the wire and the rod.
3

Step Three

For the best grounding system, install two more grounding rods spaced 10 feet apart and reaching six feet underground. Daisy-chain these rods to the grounding wire as well. Check the Warnings Section below for more information about grounding rods.
4

Step Four

How you install your fence posts will be determined by how much land you are protecting. If you have a farm or other large parcel of land, then you will want to space your posts between 25 and 75 feet apart. Use the post-hole digger to make the installation quicker and easier. The distance between posts ensures that if something runs into the wire, there will be enough flexibility that it will not cause the connections to break.
5

Step Five

With the fence posts installed, it is time to install the wiring. Start your wiring with the farthest post from the electric fence controller. Make sure to use proper splices and tight connections throughout. Wrap your connections with insulation wrap to help reduce corrosion.

The common height for an electric fence for horses is 48 inches. With fences this high, it is best to run wires closer together (about six to eight inches apart) near the bottom of the fence to prohibit smaller animals from getting in. The wires from the middle to the top of the fence should be spaced about 10 inches apart. One wire should be set at shoulder height of the animal to be contained.
6

Step Six

When each post is wired, use an insulated length of 10 to 14 Gauge, 20,000 Volt wire as a jumper to connect each of the rows of wire. For instance, connect a jumper wire from the top wire to the second, from the second to the third and so on.
7

Step Seven

Now that the fence wires are connected, make your connection from the electric fence controller to the top wire of the electric fence. Once your connections are made, go back and re-check all of your connections along the fence. Do this before applying the power. When you are finished, insert the electric fence controller's plug into the available polarized outlet. There should be a light on the controller that will light up to notify you that the fence is working properly.
8

Step Eight

Once your installation is complete and the fence is electrified, use a voltmeter to check voltage along the length of the fence to ensure the electric is flowing the entire length.

Tips & Warnings

  • Place "Warning: Electric Fence" signs as often as you need, so from any vantage point one is easily seen
  • Educate family and friends how to safely disconnect the electric fence in the case of an emergency
  • Check your electric fence thoroughly every year for signs of damage, poor connections or poor insulation
  • Avoid installing your electric fence grounding system within 50 feet of any utility grounds, underground telephone lines or water pipes.
  • Do not use standard household electric wire. It is only rated for 600 Volts
  • Avoid using barbed wire
  • Do not add any other pieces of equipment to the circuit dedicated for the electric fence
  • Do not "tie in" any equipment to the electric fence field controller
  • Only fuses rated for 1 Amp/250 Volts should be used for the electric fence
  • Avoid adding a second fence controller on the same fence at the same time
  • Avoid standing near the electric fence during a lightning storm
  • If you are using metal fence posts, ensure that the wire DOES NOT come in contact with the post

Please order online 24/7 or call VALLEY FARM SUPPLY at 717-786-0368

November 21, 2013

How to Select, Install Electric Fence

How to Select, Install Electric Fence
Advice from an electric-fencing expert on selecting and installing it for maximum security and safety for your horse. Plus, a maintenance checklist for you.

When you need to build a new fence or replace an existing one, there's a major reason for using electric fence: Properly selected, installed and maintained, it's the most effective way to safely contain your horse. It's also economical and easy to install and maintain. Let's look at the basic components of an electric fence and how to avoid common problems.


Key Electric Fence Components
Charger. Sometimes also called an energizer or fencer, the charger needs to be powerful enough to deliver a definite jolt when your horse touches it, even when its current is reduced by vegetation touching the fence line or (as sometimes happens) by moist, dewy early-morning conditions.

Ignore chargers whose power is rated by miles; look instead for one rated by joules, a measure of the oomph with which the charger is pulsing its thousands of volts of current through the fence once every second. One joule is a minimum rating for fencing that encloses up to five acres, but I always recommend getting the most powerful charger you can afford. A higher joule rating doesn't mean the fence's jolt--which can't injure horses or other animals--will be harder or more painful, but that it will be more consistent.

The difference in cost will be insignificant compared to the value of your horses and your peace of mind; expect to pay $100 to $120 for a good one-joule charger that plugs into an outlet in the barn or elsewhere; six-joule chargers now sell for less than $200, a small premium for peace of mind. (Worried about your electric bill? Fence chargers use negligible amounts of power, whatever their rating.) I recommend solar-powered chargers--about three times as expensive as the plug-in type--only for paddocks where 110-volt power is unavailable; as well as delivering relatively low power for their cost, they're susceptible to failure.

It's possible to run insulated cable up to 1/4 mile from a charger to the fence without significant power loss. Install the charger under cover (except for solar-powered chargers, of course), where you can check it easily during each day's routine. Most chargers have a light that flashes with the electric pulse when they're plugged in and functioning.

Ground system. This is a series of three 6-foot-long, galvanized-steel rods pounded into the ground 10 feet apart and connected by insulated cable (see below) to the "ground" terminal on the fence charger. (In areas where soil is very dry, more than three rods may be needed.) Assuming that you have a good charger, the ground system is the key to your electric fence's effectiveness. If your horse touches the fence, he feels a jolt only when the brief pulse of electric current that goes through his body and into the ground is picked up by the ground system and returned to the fence charger, completing the circuit. Be sure to use a ground rod clamp to attach the ground wire as tightly as possible to the rod, rather than just wrapping it around.

Insulated cable. The cable that carries the electric pulse from the charger to the fence needs to be specifically for electric fence, with insulation rated for up to 20,000 volts (most fence chargers emit from 5000 to 10,000 volts)--the same degree of insulation as on automobile spark plugs. By using cable designed for electric fence, you avoid the electricity leakage that results when you connect the charger to the fence with heavy-duty household electric cable, whose insulation is rated for only 600 volts.

When attaching the cable to the fence itself, use a connector clamp rather than just wrapping the cable wire around the fence; cable connected by wrapping comes loose more easily or loses power due to oxidation or corrosion buildup. All fence manufacturers sell a connector clamp designed to work optimally with their product. You'll also need the cable to carry the electric fence current from one side of a gate to the other: Connect all strands of the fence to the cable on the side of the gate nearest the charger.

My preference is to then run the cable above the gate via an archway high enough to safely admit horses and paddock-maintenance equipment, but most people prefer to run the cable underground. That's fine as long as the cable is encased in waterproof plastic tubing, plugged at each end with silicone caulking and buried in an 18-inch-deep trench to protect it from damage by hooves and equipment. On the far side of the gate, use connector clamps to attach all strands of the fence to the cable.

Cut-off switch(es). Save lots of extra steps by installing a weatherproof knife-type cut-off switch (sold in the electric fence section of farm stores) between the insulated cable and its attachment to the fence, enabling you to turn the fence off without going back to the barn to unplug the charger. I also like to install cut-off switches on both sides of a gate--multiple cut-off switches allow you to isolate sections of the fence for easier trouble-shooting.

The fence itself. Visibility is key to an electric fence's effectiveness and safety. Materials such as 1.5- or 2-inch poly tape, braid, rope or coated HT wire make the fence easy for your horse to see and avoid. (Thinner fence materials such as poly wire or 1/2-inch poly tape are suitable for temporary installations or as a "hot wire" to keep horses away from solid fence; uncoated electrified wire--although dangerous when used as a fence material on its own--can also be used to protect solid fence.)

Choose a product with a long warranty (for instance, some fence materials have a guaranteed lifetime of 20 years) and follow the manufacturer's recommendations for number and spacing of strands. A good general rule of thumb is four to five strands of fence, 4 to 4.5 feet high, for perimeter fences and three to four strands for interior fences. Space the top two or three strands no more than 12 to 14 inches apart and the lower strands 18 inches apart, with the lowest strand 18 inches from the ground to minimize interference by grass and weeds.

Insulators. The type of insulator you need (to hold the fence material on the post that supports it, while preventing the fence from contacting any surface that will cause current to leak) is determined by your choice of electric fence; most manufacturers market insulators specifically suited to their fence products. In general, braid, rope, and coated wire are installed on insulators that allow the fence to slide through. To help prevent chafe and wear on a tape fence, however, insulators need to be the type that clamps and immobilizes the tape (especially important in windy areas), and to be installed vertically on the fence post. Avoid cheap "generic" insulators (often made of brittle plastic), which only last a few years.

Testing, Testing... Why It's Important
When your electric fence is built, monitoring its voltage regularly--I recommend daily--is a basic management practice, just like checking water buckets. Use a digital voltmeter that tells you exactly how many volts of current are on the fence. (How many volts are enough? Four thousand to 5,000--remember, there's no way this jolt of current can hurt your horse, but it needs to be definite enough for him to remember it and want to avoid it.)

Your first check of your new fence's voltage gives you a baseline so that future checks can alert you to voltage drops that signal problems. Depending on the strength of your charger, it will emit 6000 to 10,000 volts when nothing is connected to it. After you've hooked it to your fence, check the voltage at the furthest point from the charger. Some drop in voltage--1500 to 2000--is normal. A more than 2000-volt drop means either your charger is underpowered for the fence, vegetation or something else is "loading" the fence (touching it, causing voltage to leak away), there's a short-circuit somewhere in the system--or a combination of these.

If the base voltage on your newly built fence is 4000 or better and everything's working fine, watch on subsequent checks for an overall voltage drop of 1500 or more. (It's normal for voltage to be 500-1000 lower in the morning when moisture on the fence, posts, and nearby vegetation can cause temporary current leakage.) Such a significant decrease means it's time to check for problems and correct them before your horse discovers the fence no longer packs a punch; in fact, many horses can sense when the fence is or isn't functioning.


Electric Fence Maintenance Checklist
  • Look for and remove sources of "load." Mow or trim under bottom strand to prevent grass and weeds from touching the fence; watch for fallen limbs or other objects on the fence or caught in insulators. (Tips: Listen for the rhythmic snap that indicates a voltage leak; follow your ears to find the source. Drag a long stick on the ground beneath the bottom strand as you walk the fence-line; it may knock away an interfering object you don't even see.)
  • Check insulators. A broken insulator can allow the fence strand to touch the post--not an immediate problem with a nonconductive wood post, but if you're using steel T-posts a broken insulator can cause the fence to go dead when the strand touches the metal.
  • Check connections. Ground-rod wires can get knocked or kicked away. Wires attaching the cable to the fence may come loose.
  • Check the charger. A spider's web built between terminals can cause it to spark.
  • Check insulated cable. Look for places where the cable may be abraded, for instance where it passes through a hole cut in metal barn siding.
  • Check fence strands: Look for frayed spots in poly tape--if metal fibers in the weave become separated, tape can't conduct current.

Texas-based international fence authority Bob Kingsbery grew up on a family-owned horse-breeding farm; he has written widely on electric fencing and has conducted more than 300 seminars on fence technology and grazing management throughout the world. You can reach him with your electric-fence questions via email at bob@kingsbery.com.


This story originally appeared in the March 2004 issue of Practical Horseman magazine.


Please order online 24/7 or call VALLEY FARM SUPPLY at 717-786-0368

November 21, 2013

How to Build High Tensile Fence

How to Build High Tensile Fence

Building your High Tensile fence

You have already decided what kind of fence you need, now the next step is to determine where you will put it. Be sure of your boundaries, check local laws and regulations pertaining to fencing and locate any potential hazards, both natural and man-made, such as underground utility lines and overhead electric wires. Make sure the fence path is clear of brush and debris. Once you're ready, install all end and corner posts. Next, run out a single guide wire to help assure a straight fence line. This wire will become the bottom wire of the fence and serves as a guide for setting the line post.

Attach the guide wire to both end posts. Use a chain grab wirepuller or an in-line strainer to pull the guide wire taut (about 100 pounds tension). For safety's sake, wear appropriate clothing, heavy leather gloves and eye protection when working with any wire fence and, when driving posts or operating other power equipment, wear hearing protection. If the terrain is hilly, drive the rise and dip post first and staple the guide wire to them before setting the line posts.

Setting the post(s)


Check the chart, which gives suggested post space distances for the type of fence that you are building. In most cases, the use of Kiwi Droppers® will allow you to reduce the cost by increasing the distance between posts.

Posts, small end down, can be mechanically driven with a hydraulic post driver or set using an auger-drilled pilot hole and rammed into place. Posts can be handset but driven posts have about five times the holding strength of handset posts.

If you hand set posts for brace assemblies, set the end post in concrete to keep it from uplifting. Dig the hole with a bell-bottom. Before you place the post, hammer a ring of staples, driven half way in, around the end of the post about 2 inches from the bottom. Place the post and tamp in tightly 8 inches of dry concrete mix. The soil moisture will cause it to set up. Fill the remaining hole with tightly tamped dirt to ground level. For gatepost, add an additional 8 inches of dry concrete mix 18 inches from the top of the hole. Fill the hole with dirt to ground level, tamping tightly.

To prevent overturning a post in soft soil and lifting of a post in a dip, increase the post length and drive deeper; again, check the chart.


Brace assemblies

The ASAE (American Society of Agricultural Engineers) recommends a double brace end assembly for American soil conditions. A double brace is rated at 9,000-lbs. pullover resistance and is more suitable for longer runs and larger livestock. Single brace assemblies can be used for fences of six wires or less. You can increase the holding ability of a brace assembly by increasing the length of the top horizontal post. Recently, a new double brace has become popular, which has the holding properties of a traditional double brace, but affords a cost savings in materials and labor. Drive a 6"x8' end/corner post but then use 4"x7' posts for the rest of the brace. The key is that the brace wire extends in a double wrap from the bottom of the end/corner post to the brace pin on the second brace post. To make the job neater, double figure 8 the brace wire.


Corners and changes in direction


A corner can be made using a common end post and building two brace assemblies at an angle from that end post. To reduce material costs, corners may be constructed using post leaning against the pull of the wire: For every 10-degree directional change, use a 4" x 8' post on a 4" lean, 4' deep; for every 20-degree change, use a 5" x 9' post on a 5" lean, 4 1/2' deep; for every 30-degree change, use a 6" x 9' post on a 6" lean, 5' deep. Drive the post by machine on a lean or to the bend. With either type of corner, string the wire to the outside of the bend, or any curve in the fence for that matter.


Stringing the wire

Once the line posts are set, mark them for the proper wire spacing, and string the remaining wires. A spinning jenny or multi-wire fencer will make handling the wire easier.

For electrification, slide on the required number and type of insulators. Staple the wire accurately to its mark at all corners, major dips and rises, and at the post next to where you will install the in-line strainers. These points will create some friction. The in-line strainers should be installed near the middle of these friction points.

To ease installation, attach a chain grab wire puller to the wire at least four feet from a post, pull out the slack, cut the wire and use crimping sleeves to secure the strainer. Thread the other end of the wire through the hole in the drum, cut off the surplus. With the handle turn the drum until no slack remains. Use one tension indicator spring for each set of in-line strainers.

Joining and tying off wire

You can join wire by manually tying a knot but a knot in the wire will reduce the wire strength by a minimum of 30%. It is better to join wire with a mechanical wire link or three crimping sleeves; both create a joint as strong as the wire. To anchor wire at the end, as in joining wire, you can knot the wire but you reduce its strength. The better way to anchor the wire is to use two crimping sleeves or drill holes into the end post and use a wire vise mechanism, which has a tapered barrel that firmly holds the wire.


Stapling

Before stapling the remaining line posts, tension the wire taut, about 100 pounds, using the in-line strainers. This will prevent crossed wires and aid in positioning the wire. To reduce pullout use 1 1/4 - to - 2 - inch long, 8 or 9 gauge slash cut, electro-coated galvanized staples with barbs. If you rotate the staple 30 to 45 degrees away from the flat face, you will prevent the post from splitting and the staple leg will spread, curving outward from the flat face for greater holding power. Drive staples at an upward angle into posts in dips and at a downward angle into posts on rises. The staple should allow the wires to move back and forth freely. Staple the wire to the livestock side but on the outside of corners and curves.


Tensioning the wire


One in-line strainer per wire can tension 4, 000 linear feet of high tensile wire on a straight-line fence over level terrain. To calculate the number of in-line strainers needed add 500 feet for each corner, severe dip, rise or curve to the total linear feet of your fencing project. Divide this total by 4,000, round the answer up to the nearest whole number (for example, 1.3 = 2) and multiply by the number of wires on your fence (2 x 6 wires = 12 strainers or two sets). Tensioning from the top wire down will provide clearance for turning the in-line handle. Use the wire with the tension indicator spring attached as a guide to tension the other wires. Pull the wire towards you and tighten until all the wires have the same "feel" (resistance). After a day or so the fence will set, check each wire and if necessary, correct the tension to the recommended 250-lb. pull.


Grounding non-electric fence

All fences utilizing steel wire on nonconductive posts must be grounded for safety from lightning. Drive a galvanized steel post, 3/4 - inch galvanized steel pipe or an approved ground rod at least 3 feet into the ground, not more than 300 feet apart (150 feet in dry, rocky soil). Attach 5 strands of galvanized wire to the rod and lace through each fence wire. Bend the top of the ground wire bundle into a loop and staple home to a post.

Electric fence

Your high tensile fence can be easily electrified using new high voltage, low impedance type energizers. The construction methods described for non-electric fences also apply to electric fences with one important exception. Energized wires must be insulated from the post; The need for insulation makes it necessary to plan for electrification before you begin construction. For specific help on energizer selection see Energizer guide.

November 20, 2013

How to Make A Well-Grounded (Earthed) Fence

Make A Well-Grounded (Earthed) Fence
Tips from a New Zealand grazing farmer and consultant to keep your fence hot and your livestock in.

By Vaughn Jones

Editor's note: Noted New Zealand grazing farmer and consultant, Vaughn Jones, has been building and troubleshooting electric fences since 1954. Here he provides a checklist of advice and tips to solve one of the most common causes of fencing failure: Poor grounding -- or "earthing" as they say "down under." 

For your fence to function correctly, your earth (ground) system must be perfect. But very few are, despite the instructions provided with most energizers. Also I've not seen an instruction book with complete details of how to achieve perfect earthing and completely trouble-free operation in all respects. So I'll give all I know here:

Most farms seem to have earth systems which can't cope with the flow of electrons coming back to it from fences with poor insulation, leakage into vegetation, and the occasional wire which breaks and touches the ground or touches a non-insulated wire. Energizers have become more powerful, but many ground systems and their recommendations have not kept up with them. 

When the energiser (charger) earth system can't handle the increased flow of electrons, they find other ways of getting back to the power supply earth system. Unfortunately they sometimes do this through the cows and milking machine, and through steel water pipes or the water in plastic pipes. 

Guide to Good Grounding 

When the energiser earth system can't absorb the increased flow of electrons from leakage, electrons find other ways of getting back to the power supply earth system. Energisers put out thousands of volts, and just one volt through the cow's mouth or teats can upset her. Here are methods to follow to avoid that:
  • The energiser earth system must be installed well away -- at least 10 m (33 feet) from mains power earth peg, preferably on the opposite side of the building.
  • Use 25-mm (1-inch) or larger diameter new or near new galvanised pipe driven as deeply as possible into a moist soil, each at least 10 m (33 feet) apart. Thin, black or rusty fence posts or similar are not suitable. Rust is a bad conductor. A large surface area is needed to give a large contact area between the soil and pipe.
  • One metre (3 feet) of earth pipe per joule of output of the energiser is usually sufficient for satisfactory earthing in conductive soils. Long earth pipes which are driven deep into the soil give far better earthing than the same total length at shallower depths because soils are more moist and have more conductive minerals at lower levels. Two 3- metre-long pipes are better than three 2-metre-long pipes when driven deeply this way. Large diameter pipes have a greater soil contact surface, so are better than thin rods.
  • Install the earth system well way from water pipes and bores which are being used. But an unused steel pipe bore can be an excellent earth if it's not rusted or broken.
  • Connect the terminal marked Earth or Ground to the earth pipes by one continuous length of double insulated electric fence leadout cable -- not household or industrial cables which are made for only 400 volts, not for 10,000 volts. The cable should contain 2.5-mm (16-gauge) galvanised wire -- not thinner and not copper wire, which causes electrolysis at the joins. Bare and clamp the cable securely to each pipe with galvanised clamps. Ordinary galvanized wire can rust where it is damaged or touches the ground. Using cable eliminates this.
  • It is best to have no voltage on the earth system, but a maximum of 200 volts (and up to 300 volts on a large energizer) are acceptable when the fence has been shorted out to as low a voltage as possible.
  • Soils are not good conductors, so electrons spread out inclining towards moist and mineral soils when travelling back to the energizer. Aim for a moist area, work out a system of keeping the area around the earth pipes moist. If necessary, take a galvanised wire along the bottom of a fence to a moist area, and then install more earth stakes at that point. If the distance exceeds 100 metres, use two wires. Better still, use aluminium or aluminium-coated wire which is up to three times more conductive than the same thickness galvanised wire.
  • Some soils are very bad conductors. If you have dry peat, pumice, volcanic ash soils, etc., or soils that are dry at any time of the year, and there is no wet area within a few hundred metres which could be used, a bentonite earthing system can be bought and used. They are a good value. The bentonite mix is made into a slurry and poured down 75-mm (3-inch) diameter or larger holes with pipes set in the centre. Keep them moist. This system can improve earthing by up to ten times.
  • In extremely dry areas and on snow, use an earth wire return system. This is where there is an equal number of live and earth wires kept well apart on the fence. The earth wires are joined with joint clamps (like the live wires) and connected to the energized earth terminal. The earth wires should also be earthed adequately (no voltage on them) every kilometre. These also act as lightning conductors, keeping it away from energizers.


Testing an Earth System 
 

  • Testing an earth system without the fencing shorted out is a waste of time. You must create a flow of electrons to load the earth system before testing it.
  • Also testing the earth by holding the last earth pipe can be a waste of time if the wire between it and the energiser is broken.
  • To test the earth system, first short the fence out with steel rods at least 100 metres from the earth system. Then use a digital voltmeter to measure the voltage between the energiser earth terminal and an independent earth wire. This should be pushed as far as possible (about one metre) into damp ground in a position handy to the energizer and several metres away from any other earth peg.
  • To lower the voltage on the earth system add more earth pipes and/or connect the earth wire to the bottom wire of a conventional fence.
  • Never use your water supply, bore or well as a ground or allow a charger ground wire to touch them or any part of buildings. It can cause shocks in the water and stop animals from drinking, and buildings can become a transmitting aerial for radio and phone interference.
  • Double insulated underground cable should be used for the ground as well as the live wire. Unused bore pipes or steel well liners are usually good grounds.
  • Many New Zealand farmers measure Joules (energy) roughly by holding the live wire and feeling the kick in good insulated gumboots standing on one foot to halve the electrons flowing through your body. Caution: Don't do this if you have a dicky ticker or Pacemaker.
  • High-power energizers are essential for to controlling animals where long lengths of wire are electrified. The high power is on for the very short period of 0.0003 seconds which makes them safe.
  • Voltage measured at the energizer is useless, especially if the fence wire is thin, limited to one wire or has bad connections. But voltage can be an indicator of the energy when measured at the end of a long fence.
  • The latest, best New Zealand energizers have a system of telling the farmer at the energizer the effectiveness of the fence at various points, and the earth condition, both of which are extremely clever.
  • The lower the voltage on the ground the better it is. But with high-power energizers, it can be difficult to get the voltage below 200 volts, which figure is acceptable (provided it was measured when the fence was shorted (grounded) a few hundred metres from the energizer).
  • Ensure that all electrical appliances wirings, everything metal and all concrete steel reinforcing are all connected by welding or strong galvanised clamps, not electroplated ones which rust sooner.
  • If your stock are going through fences, check the earth first, followed by the joints on the whole fence, and at the same time look for shorts.
  • Test your earth by thoroughly shorting out the fence at least 100 metres (330 feet) away from the energiser with steel standards. Doing this creates the maximum current flow so puts a load on the earth system. If your earth pipes can't handle the flow you'll get a voltage reading at the energizer terminals. If there is no voltage, then your earthing system is satisfactory.
  • You should have a digital voltmeter, then install an earth monitoring point by pushing a piece of 4-mm (8-gauge) wire into the ground handy to the energiser and measure between it and the energiser earth terminal. Don't check the last earth pipe because there could be a break in the wire to it, in which case you'll think the earth is OK, but it may not be.
  • With the fence shorted out, there should be no more than 200 volts, although no voltage reading is best. The more voltage you read flowing to your earth, the less power you will have on your fence because it indicates that the earth is inadequate and needs more pipes.
  • To improve your earth system, increase the number of earth pipes and put them in as deep as possible. Tests on several soil types have shown that depth is essential -- 2 m (6 feet) deep is the minimum, and 3 m (9 feet) deep is twice as good.
Doing all the above reduces the chances of clicks on your radio and telephone. 

An inadequate earth system reduces the output of your energiser and increases the chances of shocks in milking parlors, yards and water troughs. It takes an expert with sensitive measuring equipment left connected for 24 hours and a recorder to check for shocks in parlors. There may be none during the day, but they can occur when heaters, cookers, etc., are switched on in the late afternoon. 

Check your parlor twice a year and yards in many positions at the height of dry weather and the height of the wet period. See your energiser installation instructions for more details on installing it and an earth system. 


Poor Earthing Costs Production 

A common problem is having energiser earth pipes behind the milking parlor. Leaked electrons (there are always some) flow from the farm under the yard and parlor when the soil is moist. But when it is dry, they look for easier routes, which can be across a moist yard and through parlor pipe work. 

In wet weather, electrons can travel along the soil surface and through the parlor, especially after cows enter and pass their high mineral, highly conductive urine. This can cause electrons to even flow across the concrete surface and across pipe work, so affecting the cows. 

A short or weeds conducting power off a live wire close to the parlor can result in electrons flowing through the parlor and/or yard because it is the shortest route, especially after cows enter and urinate. The above can occur even when the earth system is perfect, simply because the electrons are flowing to it via the best, shortest and fastest route. 

To avoid this, earth systems should be in a damp area well to the side of the milking parlor, or even have earth pipes well to both sides, but never in line with the parlor. The earth leadout wire from the energiser should be insulated, and not allowed to touch any other wire, building or pipe. 

Electrons can also move through water pipes, giving shocks to cows when drinking in a paddock, so no wires should be allowed to touch water troughs. Even if not electrified, they can conduct induced current. Cows standing around a full trough waiting to drink can be a sign of power deterring them from drinking. 

Where conventional fences have a live wire running with them or as an offset wire, the conventional fence wires can absorb induced current (more so in damp conditions) and become electrified. So unelectrified wires must be earthed or they can build up a voltage which can:
  • Jump gaps (bad joins) and cause sparks and radio and phone interference.
  • Conduct current to water troughs they may touch. Animals then won't drink so growth and milk production suffer, and females can get cysts on their ovaries through stress. This happened to a herd near here causes calculated losses of $30,000 over the years it had been happening.
  • Give people shocks when opening and closing gates.
  • Give animals shocks as they go through gateways and brush against the wires tied around strainer posts.
Earthing these conventional fence lines is easy because being induced power, it is of low joules (energy or power). All they need is a piece of soft galvanized wire wrapped around all dead wires at the strainer posts and pushed into the soil. These will need replacing when they rust at ground level. 

Shocks in sheds and water troughs have cost some farmers small fortunes in lost production over several years, until the problem was identified. New Zealand manufacturers discourage grounding the fence circuit though the earth or ground terminal of the charger to the utility (power supply) grounding system because it is illegal in many countries and can cause shocks in all directions including in your shower. The power supply ground is usually just a metre deep rod. A modern high power New Zealand energizer needs ten to twenty times more. 


Safety Considerations

Keep these in mind when you build fence:

  • Don't string wires across lanes or thoroughfares without marking them clearly. Motor cyclists have been injured through not seeing them.
  • Never electrify barbed wire.
  • Train and demonstrate the shock to children and visitors with a long piece of grass.
The thought of 5,000 volt fences on farms near cities could be frightening to townies, but thousands of human contacts occur annually with nothing more than discomfort. However, care should be taken to avoid contact through the head because it is very uncomfortable. Young children and elderly people should be kept away from even low powered fences. 

Electrified fences in any position where the public could come in contact with them must be clearly marked with approved warning signs at frequent enough intervals so as to be easily seen. 


Radio Interference 

It is an offence to operate any appliance which causes any electronic interference, so points to note include:
  • Some energizers cause more radio and/or phone interference than others, even if not on a fence. Switch it off, disconnect the fence and earth (ground) cables (wires) at the energizer (if they were loose the sparking there could cause interference) and switch on the energizer and check for interference.
  • If the interference is still there, return the energizer to the supplier and try another unit or brand. Some brands are bad.
  • If the interference disappears when the fence and earth are disconnected:

     
    • Tighten all joins and clamps on the energizer and fences. Those on some energizers work loose because of the thump (vibration).
    • Ensure that all wire connections are figure of eight or reef knots, or are clamped and tight.
    • Tube insulators will crack and leak in time. Even double tubes and those with steel inserts leak and spark in some cases.
    • Sparking causes radio and telephone interference so insulators must be good quality with adequate tracking distance to avoid arcing over the surface as occurs with staple insulators or through the insulator as occurs with single tubing. Use quality insulators with at least 25 mm (1 inch) of tracking distance (length on insulator from the live wire to any other point).
    • Some cable can have breaks in it causing sparking. Single insulated cable gets cracks sooner than double. (Try bending a sheet of cardboard and a wad of paper the same thickness and you'll see why. The card will crack.) Some of the orange cable from New Zealand cracked and leaked soon after installing. Replace it all.
    • Even the best cable when buried can become damaged by a stone and then leak. It is essential that all be threaded through 12 mm (half-inch) or similar black plastic piping to give it physical protection. If the distance is long, push a piece of high tensile wire (with its end bent back) through and then pull the cable through. To check under gateways, disconnect before each one and check if the interference stops.
    • Ensure that the earth is perfect. Check it at the energizer, not at the last earth pipe as shown on some instruction books. There could be a break in the cable so there would be no voltage at the last, or even first pipe.
    • The earth cable should be one continuous length of double insulated cable or be joined with a good galvanised joint clamp, and must not touch any building or pipe. Support the cable in good insulators.
    • Use a digital volt meter to test the earth and to locate shorts and maintain tidy, trouble-free fences.

       
  • If you still have interference, tighten all joins and clamps on the farm. This is best done in summer when joint clamps have expanded.
  • Walk along all fences and wires with a radio tuned off the station and clicking. It will get louder close to the interference cause.
  • Shorting to vegetation or to any grounded object can cause clicking, so disconnect the bottom wire and/or clear the fence line with a weed wiper. Once grass touches a live wire, stock won't graze it, or anywhere near it, so the problem increases. Always have the bottom wire able to be disconnected with a flexible connector and do so before vegetation touches it.
  • The mains power supply (utility) earth and all connections including power point terminals and plugs must be adequate with no loose or old verdigris connections.
  • If wires run parallel with overhead phone wires on underground phone cables interference can be worse, so avoid the constructing of electrified fences parallel to telephone lines or cables and aerials, or parallel to other long fences which could act as aerials.
You might find this difficult. Having changes in the fence to under-gate cable reduces the length of "aerial" electric fence wire. It is long lengths of electric fence wire parallel with long lengths of telephone or similar wires which cause the problem which can grow as the fences are extended over time. The closer they are the more the induction. The break causing the spark and interference can then be on the induced wire. 

Radio interference is worse in poor reception areas, and if the radio is not tuned exactly on the station. Telephone systems are not always perfect. 


Lightning Protection 

The long distances of electric fencing now used increase the chance of a lightning strike, so an effective protective system should be used. Lightning often hits the power supply line and goes through the energizer to its earth system blowing its fuse or components. The power (utility) supply earth system should be good enough to attract the lightning rather than have it go through the energizer to its earth.

Finding Shorts 

The solid state digital volt meter is important for fault finding and for testing the earth system. It enables accurate reading of the voltage and easy fault finding, because of its extreme accuracy. 

Start by going to the first switch (these must be installed along fence lines to save going back to the energizer to switch it off for repairs and for fault finding) and see if the voltage before the switch increases after opening the switch to stop current flow down the farm. 

If the voltage increases then go to the next switch. If not check the fence between the switch and the energizer. Neon fence testers are also available, but of no use for finding small leaks or earth system faults. Many are bought and not used for long before buying a digital volt meter.

Electric or power fencing helps make animal farming profitable and sustainable, so the effort required to achieve the above suggestions is well worthwhile. If installation is good and monitoring is done, the labour required is less than with any other system and the profit is greater. 

If you have problems, read all the above again. There is a lot to take in, but once you understand it, it becomes second nature. 

Take pride in your fencing and enjoy your animals.

Please order online 24/7 or call VALLEY FARM SUPPLY at  717-786-0368

November 20, 2013

Gallagher Gets Grizzly Bear


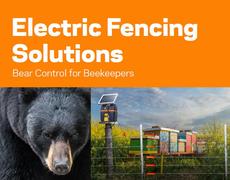
Got a problem keeping a few cows fenced in?  How about keeping a few hundred grizzlies fenced out?  Or making sure a few dozen black bears aren’t getting after your goats?


Bears of all kinds are a sometime dangerous nuisance around Yellowstone and Grand Teton National Parks and the national forests of northwestern Wyoming.  It’s a wilderness area bordered by Montana and Idaho that’s perfect habitat for a large and growing population of bears.


Bears are born scavengers that can get aggressive when they’re hungry.  Easily accessible campsites, apiaries and dumpsters are nothing more than convenient dining spots for these creatures.  When they decide to munch on whatever’s handy, they can do serious economic damage and threaten people as well as livestock.


Mark Bruscino is a bear specialist with the Wyoming Game and Fish Department.  Bears are his constant problem.  “They’re smart animals,: he said, “they’ll find a way to get around most preventative measures.  They can knock down barriers and tunnel under most fences.”


“We have to keep them out of grain sheds, small garbage dumps and dumpsters.  Most of the things we tried in the early 1990’s didn’t work,” he said.


In 1993 Morgan Renner, a Territory Manager with Gallagher, helped design an electric fence to solve the problem.  “I’m sold on it,” said Bruscino as he talked about the fence.  “It’s top notch stuff.”


The fence is “100% effective” when it’s maintained properly, according to Bruscino.


The Game and Fish Department uses permanent and temporary Gallagher fences now.  The permanent fences are where bears are a constant problem – around camp grounds, for instance.  Temporary fences can be quickly erected around sites like grain bins until the bear can be captured and transported to a remote location.


“We use a five-wire fence with high tensile strength wire.  Because it can be very dry, we use alternating hot and ground wires to make sure we’ve got full conductivity,” said Bruscino as he described the permanent set up.  Wooden corner posts anchor the fence and he uses fiberglass posts to support the wire.  The lower three wires are spaced six inches apart and the top two wires have 10 inches between them, making for a bear proof barrier.


Bruscino estimates bears have tested the fence hundreds of times without successfully breaking through.  “Usually, they just spin around and take off,” he said.  “I saw evidence that a bear swatted at the wire once but all it did was stretch it out a bit.”


To prevent “tunneling” bears from going underground, Bruscino uses a woven wire ground in some place.  Stretching about three feet out from the fence line, it’s additional discouragement to marauding beasts.


Bee keepers in the region sleep better at night and goat herds graze unmolested.  More importantly, campers can sleep safely at night, too, with nothing between them and the night air but a few square yards of canvas.


According to Gallagher, “An electric fence is a psychological barrier that keeps farm animals and wild animals where they should be with safety and security.  Because the fence is a psychological barrier, it doesn’t require great strength to be effective. However, it must be well designed in accordance with the species to be controlled, and constructed to withstand the harsh weather conditions that hit the Rockies in the dead of winter.”


Gallagher is one of the world’s largest manufacturers of electric fences designed to contain cattle, horses and other farm animals as well as prevent wild animals and predators from gaining access to areas where they can do economic damage.

Please order online 24/7 or call VALLEY FARM SUPPLY at  717-786-0368

November 20, 2013

2014 SOUTHEAST PA GRAZING CONFERENCE

2014 SOUTHEAST PA GRAZING CONFERENCE

Sponsored by Lancaster County Graziers.

Date: Tuesday, 18 February 2014 - Wednesday, 19 February 2014 Location: Solanco Fairgrounds | Hoffman Building | Quarryville, PA

Contact: Levi Fisher Phone No: 717-405-9438

November 18, 2013

Electric Fence Glossary

Alternating current
Current that flows back and forth, changing directions rapidly. AC current is typically used in households in the United States and Canada. It reverses directions 120 times per second or 60 full cycles.

Amperage
A measurement of electrical current; what you feel when you receive a shock. The higher the amperage, the more intense shock the animal will feel.

Baiting
Used to train wild animals to avoid an electric fence. Turn off fence controller. Smear an aluminum pie tin with the bait (peanut butter, honey, rancid bacon, molasses, etc.). Connect pie tin to an electric fence wire using metal wire. Locate several baited pie tins around the perimeter of the fence. After baiting is completed, turn fence controller on and monitor bait stations regularly.

Capacitive discharge
A term used to describe electric fence controllers that pulse electricity at regular intervals through a fence, typically at one-second internals.

Capacitor
An output capacitor is used to store direct current (DC) electricity between pulses through a fence. Alternating current (AC) can't be stored using a capacitor.

Continuous current
Refers to a continuous output of alternating current (AC) rather than a pulsed or cycled output. Continuous current fencers produce very low voltages and extremely low amperages in order to keep them safe. As a result, these fencers do not work well on long, weedy or wet fences. Continuous current fencers are not UL listed.

Corner posts
Sturdy wooden posts driven deep into the ground to provide extra support for the tension put on a fence line as it changes direction. Corner posts are not only used at corners, but also for gates and end posts.

Direct current
Current that flows steadily in one direction, typically produced by batteries through a chemical reaction.

Direct-discharge fencer
A type of fence controller that does not require a grounding system to deliver an electrical shock. Direct-discharge fencers are most effective on short, weed-free fences.

Distance ratings
A way of comparing the relative power of fence controllers. Ratings are based on a single strand of 17-gauge steel wire strung 36 inches above the ground under ideal, weed-free laboratory conditions.

Fence load
Any number of conditions that cause current to be drawn from a fence wire. Weeds touching the fence, broken insulators, rusty fence wire, and even wire splices all increase fence load and reduce the fence's voltage and amperage. Fence load is measured in ohms.

Ground wire return system
used where dry or sandy soil conditions do not allow a traditional ground system to work. Consists of running a ground wire parallel to a hot fence wire, delivering at the point where the animal touches the two lines.

Ground System
Necessary to create a complete electrical circuit: when the animal touches the electrified wire, the electricity travels through the animal, into the soil, back to the ground rods that are connected to the fence controller, resulting in the animal receiving a brief shock. A ground system consists of ground rods (3), hookup wire, ground rod clamps and line clamps.

High tensile
An affordable, long lasting electrified fence system that is an excellent choice for perimeter fences, providing a barrier to contain or exclude animals. These sturdy, permanent fences require braced corner and end posts in wood along with special insulators, hardware, and tools that maintain constant high tension on metal wire.

Insulator
A nonconductive material (plastic or ceramic), typically used to offset fence wire from a fence post. Insulators prevent the current from traveling through the post and into the ground, short-circuiting the system.

Joules
A measurement of electrical energy used to rate low impedance fence controllers. The effective power the controller delivers to the fence, independent of other factors that can drain voltage. The higher the joules, the more intense shock the animal will feel. (1 joule = 1 watt of power for 1 second)

Line posts
A post used to support electric or non-electric fence wire. Line posts support the fence line, and have far less tension put on it than corner posts. As a result, they can be made from a variety of materials, including metal, wood, plastic and fiberglass.

Low-impedance fencer
Low impedance fence controllers increase the joules (energy or shock) on the fence line if weeds or other vegetation touch the line. Available in AC, DC and solar powered models.

Mob grazing
The tendency among certain species of animals to graze vegetation down to the dirt. May cause animals to reach vegetation outside the fence.

Ohms
Ohms are used to measure resistance to the flow of an electric current. A low ohms reading represents a heavy fence load, and a high ohms reading represents a light fence load.

On-time / Off-time
On-time refers to the duration of the electrical pulse produced by a capacitive discharge fencer. Off-time refers to the length of time between the pulses. Zareba fencers have electrical pulses that are only microseconds long, followed by one full second of off-time between each pulse. This long off-time enables an animal (or person) to easily break away from the fence.

Pulse width
Pulse width refers to the duration of the electrical pulse produced by a capacitive discharge fencer. (See On-time / Off-time)

Resistance
Resistance is any force that resists the flow of electricity, consuming power from a circuit by changing electric energy into heat. Electricians measure resistance in ohms.

Rotational grazing
A system for livestock grazing, using internal temporary enclosures (within a boundry fence) to control the specific areas where the animals graze. This allows the vegetation in the previous enclosures to grow back. Typically is 1-strand of wire at 40" or at animal's nose level.

Solid state
Solid-state fence controllers deliver a medium amperage shock in pulses of medium duration. They are best used to control shorthaired livestock, small animals, and pets where light weed conditions exist.

Splicer
A component that joins together separate strands of fence wire, tape or rope without breaking the fence's electrical circuit.

Temporary fencing
A one to three-strand electric fence system that is used for rotational grazing or other short-term uses. It typically uses step-in poly posts or rod posts, and a DC or solar operated fence controller for portability and flexibility.

Tensioner
A component used to tighten fence wires, typically polytape, to increase tension on a section of the fence line.

Transformer
A device that increases or decreases the voltage of alternating current.

Voltage
A measurement of electrical pressure. It functions similarly to water pressure in that it "pushes" amperage down the fence wire.

Watt
A unit of measurement for electric power equal to voltage times amperage.

Please order online 24/7 or call VALLEY FARM SUPPLY at 717-786-0368


November 18, 2013

Funny Electric Fence Shock Compilation

November 17, 2013

Gate hanging tips

Gate hanging tips

Following recommended gate hanging procedures ensures your gate is stock proof, easy to open and shut, and looks good on the farm.

There is more than one way to hang a gate and most farmers and contractors have their own particular method and reasons. Because of this, Gallagher interviewed farmers and contractors and used the information from this research to formulate a recommended gate hanging procedure – the idea being to "do it once, do it right".

Good gate installation is important and using well-designed, quality gate hardware can make a significant difference in the life and functionality. Gallagher gate hangers are designed to remain secure in the post for long periods of time, which ensures the gate remains upright and swings freely.

Please order online 24/7 or call VALLEY FARM SUPPLY at 717-786-0368

November 17, 2013

Gallagher Fencing Tip: Using High-Tensile Wire Allows For Greater Spacing

I’m building a permanent power fence with high tensile wire. Any suggestions?

Don’t over tension the wire. Using high-tensile wire allows for greater line post spacing than conventional wire; usually 50 feet as a minimum. Also, don't over-tighten the wires. Make sure it’s a flexible system that allows for wildlife impacts, snow loading, etc. If you don’t “over-engineer” the fence, you’ll save lots of money.

Please order online 24/7 or call VALLEY FARM SUPPLY at 717-786-0368

x

x